Once you’ve configured the settings, added the schedule, and customized the design, you can invite attendees.
Attendees will have their own profile page and can save a custom schedule. They can also connect to their Facebook to see what their friends are attending.
Add Attendees One At A Time #
- From your Control Panel, go to the Attendees tab.
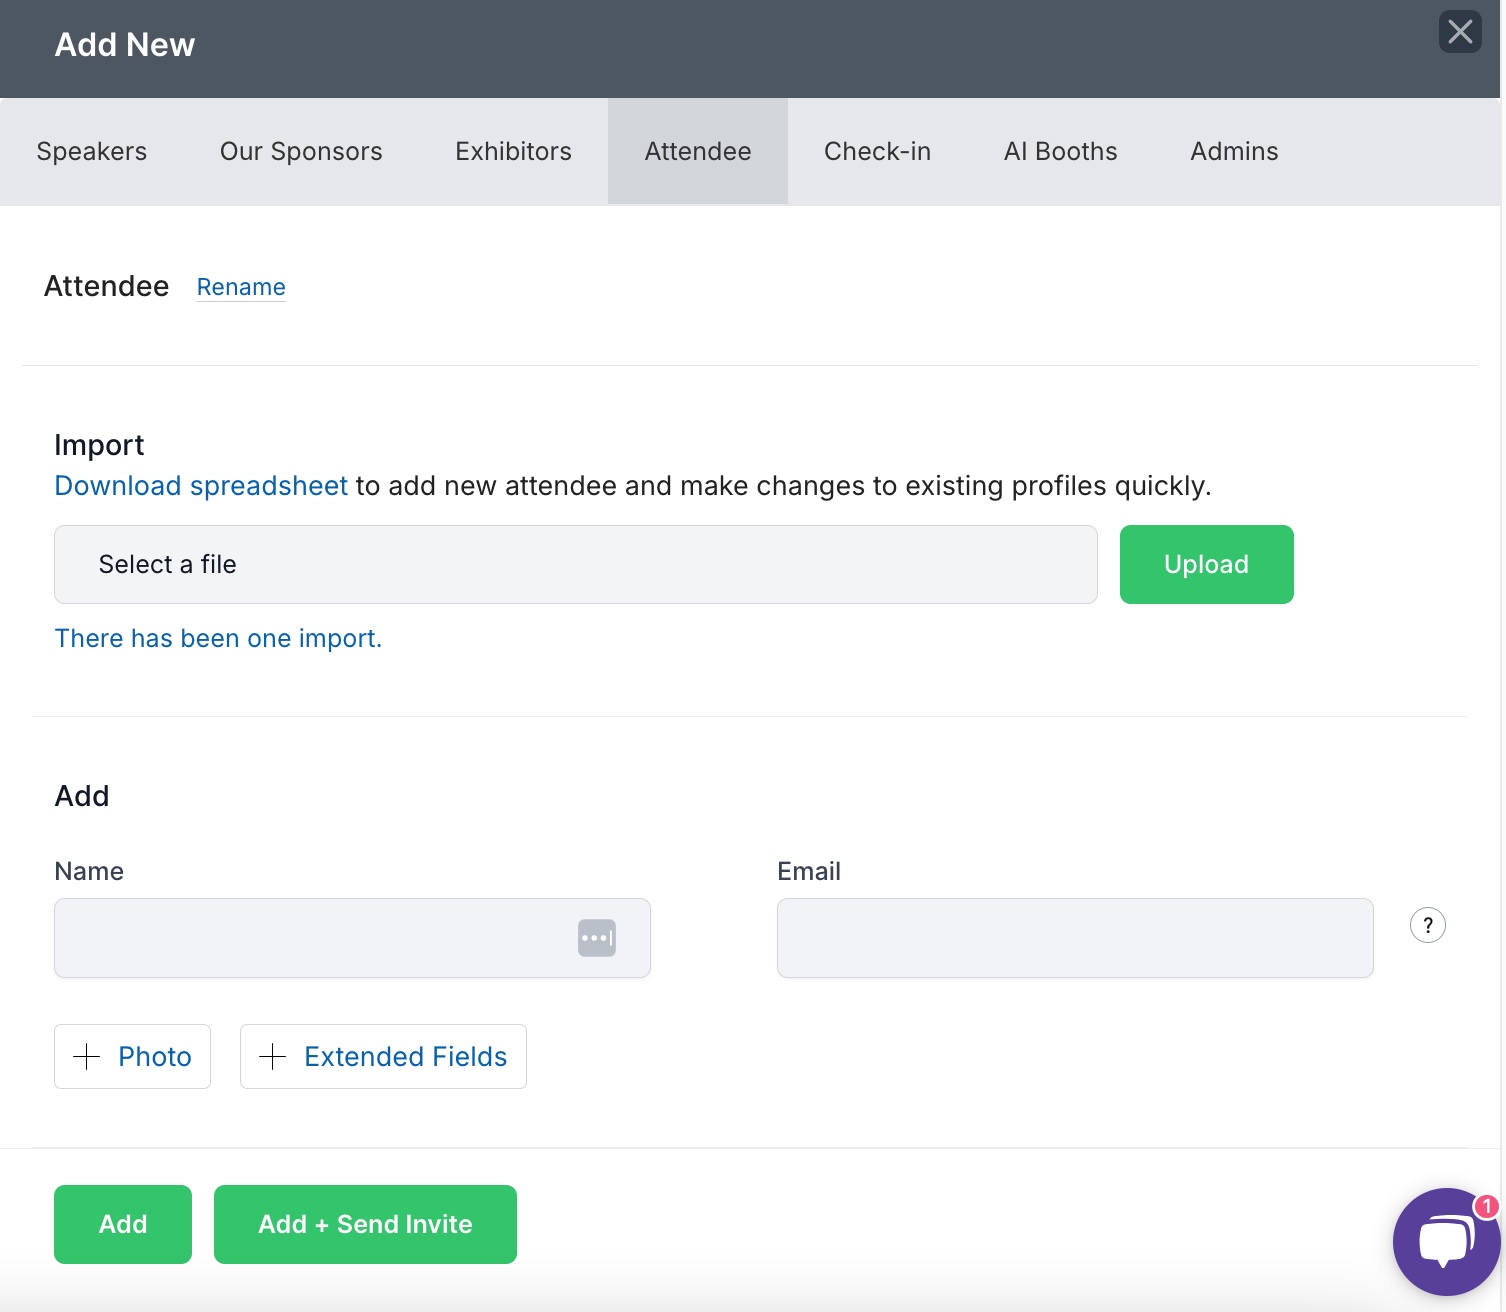
- Click the plus sign (+) button, then enter the attendee’s name, photo, email, and any other necessary information.
- Click “Add” or “Add + Invite” to instantly add the attendee to your directory. If you’re not ready for attendees to log in yet, you can send the invite later.
Add Many Attendees At Once #
You can add many attendees at once using the Excel directory spreadsheet. We recommend importing once and managing changes through the control panel. You can export and re-import at any time, but be aware that this will overwrite any changes made in the control panel, so ensure your team sticks to one strategy.
Tips for Using the Directory Spreadsheet:
- Not Possible to Delete Attendees: Deleting a row and re-importing will not delete people from your event. You can only delete people from your control panel.
- Required Format: Do not delete Rows 1–5 or any columns, as importing will not work. You can resize columns you aren’t using to take up less space.
- Renaming Attendees: You can only rename attendees manually in the control panel by clicking “Edit” on their profile.
Steps to Add Attendees Using the Spreadsheet:
- Go to Attendees and click the plus sign (+).
- Click “Download Spreadsheet.” This will include any existing attendees. Leave them intact, and only new attendees will be added when you re-import.
- Add your attendee information in a new row and save the file.
- Once you’re ready to import, click “Select a File” and then “Import.”
- When importing, you can choose to send attendees an invite to log in and make changes to their profiles.
Watch our short video guide here:
Related searches: manage attendees, add attendees, attendance


