Add one session at a time or import multiple sessions using the schedule spreadsheet. It’s faster to import most of your sessions using the spreadsheet and then manage ongoing changes from your control panel.
One At A Time #
- Go to Schedule and click the add button.
- Enter the session details; at least a title and date and you can add more information later.
- Click “Publish” to make it public or “Save as Draft” to keep it unpublished.
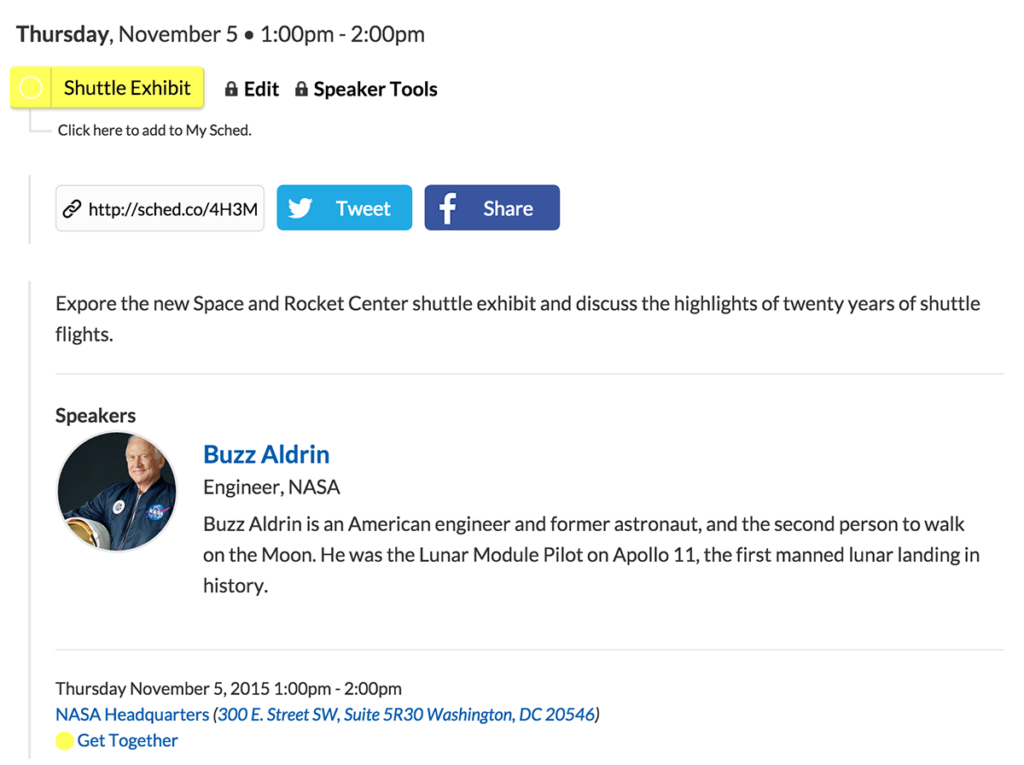
Your attendees will be able to click session tiles to view the full details:
Many At Once #
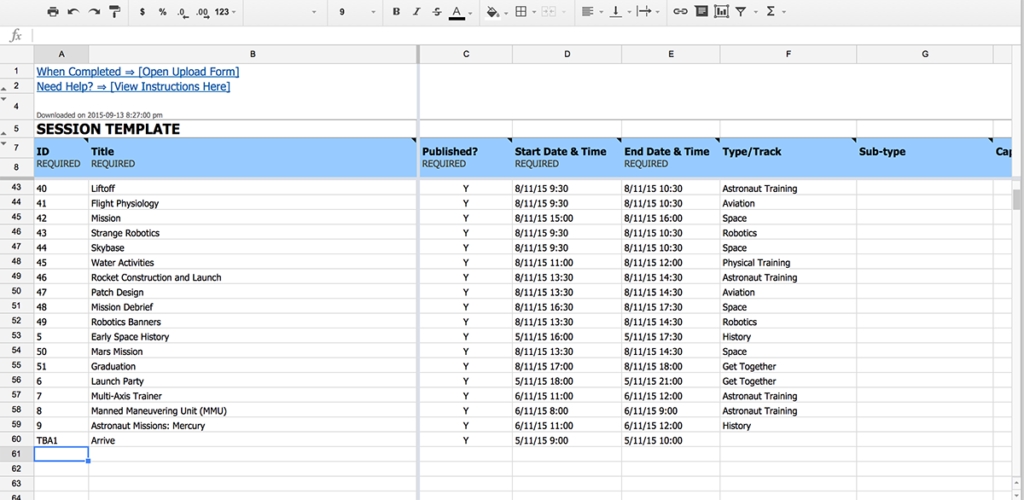
Import multiple sessions using the schedule spreadsheet for Microsoft Excel. You can make schedule changes in the schedule spreadsheet and re-import throughout the event. This will overwrite any changes made in your control panel, so make sure your team sticks to one strategy.
Tips For Using the Schedule Spreadsheet:
- Unique “ID” in Column A: Each row must have a unique ID. Using the same ID twice will cause one of your sessions to be overwritten. If you change an existing ID to something new, it will leave the original session intact and create a new session on your site.
- Not Possible To Delete Sessions: Deleting a row and re-importing will not delete sessions from your event. You can only delete sessions from your control panel.
- Required Format: Do not delete Rows 1-8 or any of the columns. Resize or temporarily hide columns you aren’t using to make the spreadsheet manageable for your needs.
- Separate Multiple Speakers with Semicolons: Use a semicolon to separate speakers, sponsors, exhibitors, etc. Using a semicolon will allow you to use commas in participants’ names. For example, you can list speakers with degrees like this: Sally Ride, MS; Yuri Gagarin, PhD.
-
- Go to Schedule and click the add button.
- Click “Download template.” This will include your existing sessions that you can make changes to.
- Add a new session, one per row.
- Save the file and import into Sched.
- You will receive an email confirmation when your import is complete.
Bulk Actions #
Publish, unpublish, or delete multiple sessions at once using Bulk Actions in the control panel.
- Go to Schedule => Sessions.
- Check the box next to each session you want to update.
- Select the action from the dropdown menu.
Important to Note:
For your event to appear in the event directory you will need to add at least 10 sessions to your event page.
AI Assistance Feature (Beta) #
Say goodbye to brainstorming session titles and descriptions, and hello to streamlined context creation with the help of AI!
Please note: This feature is currently in Beta. We welcome user suggestions and feedback to help us refine and enhance its functionality. Your input is invaluable as we work towards delivering the best possible experience for our users.
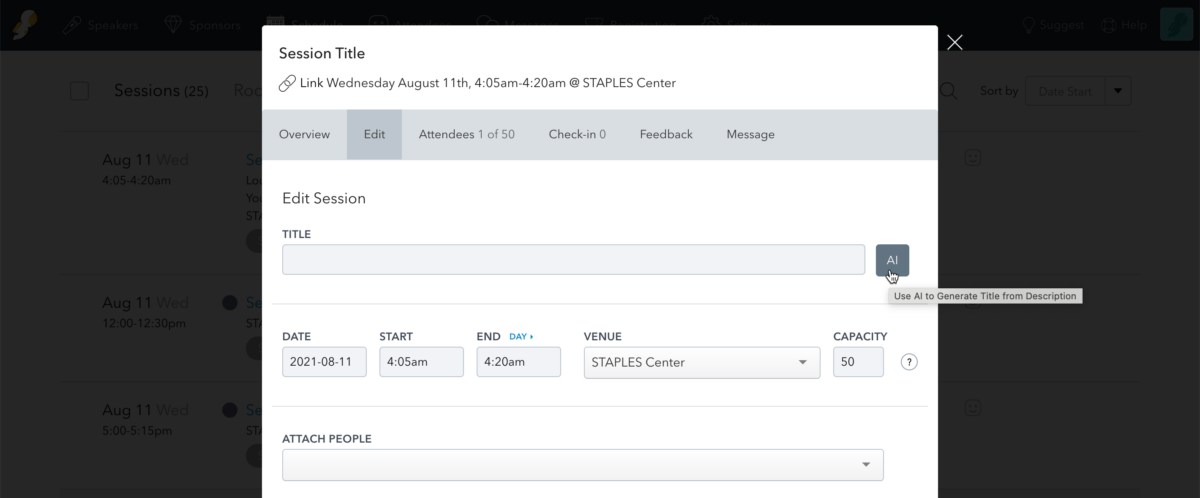
AI Assistance for Session Title
Designed to assist you in leveraging the power of AI to effortlessly generate engaging titles based on your session descriptions.
AI Assistance for Session Description


