- Public Event with Open Signup
- Public Event with Invite-Only Login
- Private Event with Invite-Only Login
- Private Event with Password Wall
- Show or Hide Pages on Your Event's Public Site:
- Show Attendance Lists for Each Session
- Show Uploaded Files and Video streams to Logged-in Attendees Only
- Reveal video streams 10 minutes before session begins
- Make video streams accessible to session attendees only
- Show Most Popular Session Page
- Domain Whitelisting
This guide will help you decide which privacy controls work best for your event. You can find these options in the Settings tab of your event’s Control Panel.
- In your control panel, go to Settings.
- Click on General Settings.
- Navigate to ‘Privacy’ at the top right of the page and click ‘Edit’ within the privacy control section.
- After making your changes, don’t forget to click ‘Save’ at the bottom of the pop-up window.
Public Event with Open Signup #
When you set your event’s privacy to the public with open sign-up, attendees can sign up directly for the event.
If your event requires tickets, attendees will need to click the Reserve Ticket button, and they will be prompted to sign up or create an account before proceeding to purchase a ticket.
Public Event with Invite-Only Login #
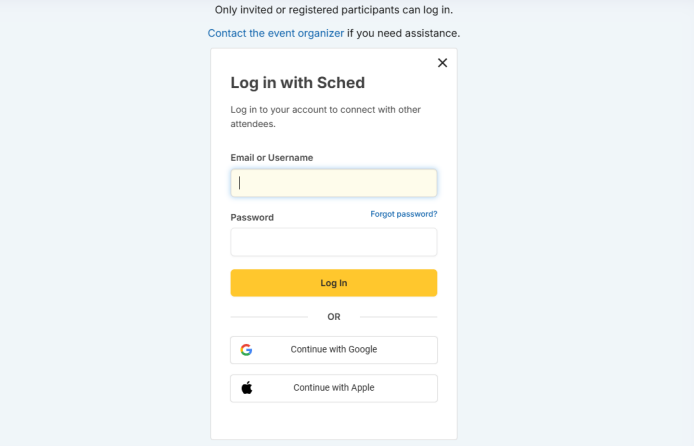
If you want to manually invite each person and prevent attendees from creating their own accounts, set your event to “Public event with invite-only login.”
Private Event with Invite-Only Login #
By default, your schedule and directory are visible online and to search engines. You can even see public events under Upcoming Events in the Sched Event Directory. If you want only specific people you invite to view the schedule and details, check the box “Private event with invite-only login.”
Private Event with Password Wall #
You can require a password to view your Sched event page. This will protect your schedule so only people with the password can access the page. They can view the schedule after entering the event password to unlock your Sched event page.
Important Note:
- Registration: If only registration is enabled and not a ticketed event, once a user logs in, they will be prompted immediately to complete their registration.
- Ticketed Event: For ticketed events, once a user logs in, they are routed to the ticket page. After selecting their ticket and clicking “Next,” they will see the registration form.
- When setting up your event, it’s best to start with “Invite Only” or private settings. This prevents unwanted attendees from joining during the preparation stage. Once you’re ready and everything is set up, you can change the settings to make your event public, enable open sign-ups, or make it visible to a wider audience.
Show or Hide Pages on Your Event’s Public Site: #
To make specific pages visible or invisible on your event’s public site, follow these steps:
- Log in to your control panel.
- Go to the Settings tab.
- Click on the Pages section within the Settings tab.
- Find the page you want to manage in the list.
- To hide the page, drag it down into the Hidden section.
- To show the page again, drag it back to the Active section.
- Don’t forget to save your changes.
This will allow you to control which pages are visible on your event’s public site.
Show Attendance Lists for Each Session #
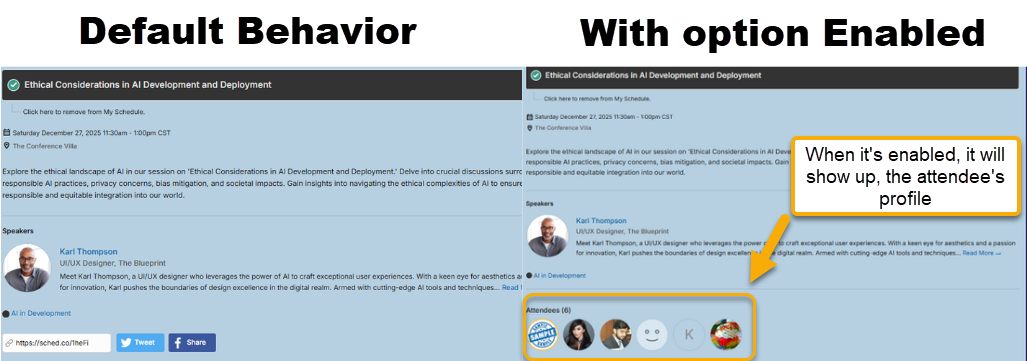
Attendees who have added a session to their schedule will be listed at the bottom of each session page. To hide the list of attendees, navigate to Settings, go to Content, and toggle the option to off. To display the list again, toggle the option to on.
We recommend leaving this on since individual attendees can make their profiles private.
Show Uploaded Files and Video streams to Logged-in Attendees Only #
Sched includes unlimited file hosting to add files to sessions. To make the links to these files or added video streams visible to logged-in users only, navigate to Settings, go to Content, and toggle the option to on.
When a user is logged in:
When a user is logged out:
Reveal video streams 10 minutes before session begins #
You can prevent access to your event’s video content based on time. To enable this feature, go to Settings under the General Settings section, and you can find the option to enable it under Content.
User view:
Make video streams accessible to session attendees only #
For Boost and Ultra Plan customers, you have even more control over access to your event’s video stream content. Use this setting to restrict video stream access to session attendees only. Go to Settings => Attendance.
Show Most Popular Session Page #
Participants can click “Popular” in the sidebar to browse sessions sorted by the number of signups.
To disable the page, turn off the toggle in the Settings tab, click General Settings, and go to Content to enable or disable.
Domain Whitelisting #
By default, email accounts from all domains can create accounts on Sched. Restrict account creation and login to specific domain(s) in your event settings. Use domain whitelisting with these privacy options only:
- Public event with open signup
- Private event with password wall
To enable domain whitelisting, add the domains you would like to allow for account creation. Go to Settings under General settings and look for ‘Account creation domain whitelist‘ to add domains, then click ‘Save‘ once you’re done
Please note: If your event has Eventbrite connected, whitelisted domains are not enforced.


